The Ultimate Guide to Tile Spacers: Choosing the Right Size and Type for Your Project
When you decided to renovate your kitchen, you probably didn't think choosing the right tile spacers would be as important as selecting the perfect tile. Yet, here you are, realizing that the key to a flawless finish lies in the small details.
Whether you're a seasoned professional or starting your first DIY tiling project, grasping the myriad of spacer types and sizes is essential. The right choice can make all the difference, from ensuring uniform grout lines with X-shaped spacers to achieving a level surface on countertops with U-shaped ones.
Let's explore how to manage these options, ensuring your tiles fit perfectly and stand the test of time.
Tile Spacing 101
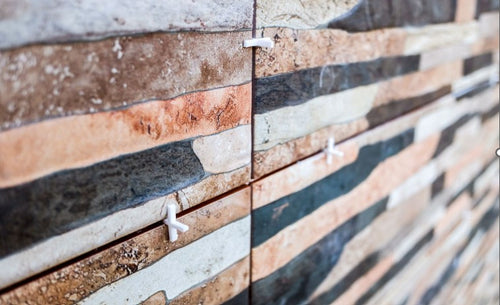
As the basics of tile spacing are key to achieving a professional and polished look in your tiling project, mastering the use of tile spacers is essential. These small but mighty tools guarantee that each tile sits perfectly next to its neighbor, maintaining consistent spacing and promoting even grout lines.
The secret to a seamless tile installation lies not just in your technique but in the strategic use of spacers. They're your best defense against the common pitfalls of shifting and cracking tiles, making sure each piece remains securely in place as the adhesive dries.
Choosing the right spacer size is critical; it influences the width of your grout lines and, ultimately, your project's aesthetic and functional outcome. Remember, the size of the spacer dictates the breathing room your tiles have, accommodating natural expansion and contraction over time. This minimizes the risk of damage, making your installation durable.
Types of Tile Spacers
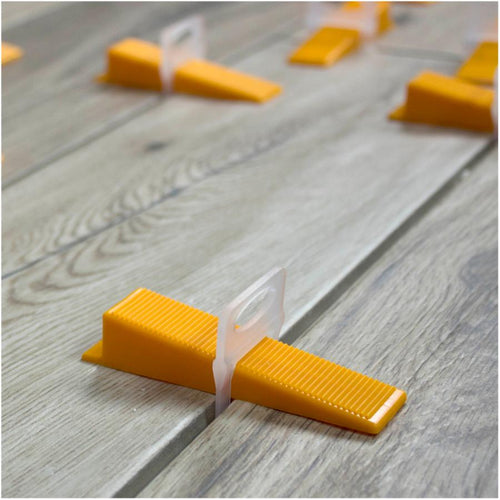
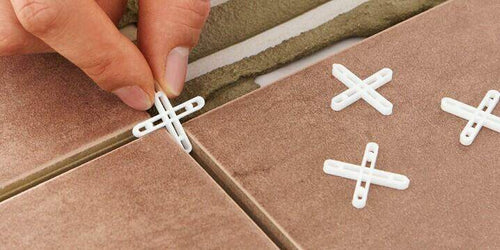
Exploring the array of tile spacers, you'll find options like X-shaped, T-shaped, and U-shaped designs, each tailored to specific tiling tasks. X-shaped spacers are your go-to for creating perfect four-tile intersections and achieving that classic checkerboard pattern with precision. They fit snugly at the corners, ensuring uniform gaps that contribute to a visually appealing finish.
On the other hand, T-shaped spacers are indispensable for three-tile junctures, particularly in offset layouts where alignment and spacing consistency are key. Their design allows seamless integration into your tiling workflow, enhancing the space's aesthetics and functionality.
U-shaped spacers prove invaluable when tackling surfaces like countertops and walls. Their versatility and range of sizes cater to various project needs, facilitating a level base for tile installation. These spacers are especially useful for ensuring even spacing and alignment in areas that demand high precision.
With their unique ability to adjust tile alignment on vertical surfaces, wedge spacers offer a dive layer of flexibility. Crafted from different materials such as plastic, wood, or ceramic, these spacers are designed to meet the diverse requirements of your tiling projects, ensuring each tile sits perfectly in place.
Choosing Spacer Size
When selecting the size of your tile spacers, it's essential to take into account the width of the grout lines you're aiming for to achieve a cohesive look.
Your choice directly influences the overall appearance and integrity of your tiled surface. It's not just about aesthetics; it's about ensuring proper alignment and spacing that stands the test of time.
Consider the tile dimensions and layout complexity when choosing your spacer size. Larger tiles often expand and contract more than smaller ones, necessitating larger spacers to accommodate these changes without compromising the tile work.
Conversely, smaller tiles may look best with tighter grout lines, requiring smaller spacers to maintain a seamless appearance.
Spacer Shapes Explained

Why should you care about the shape of tile spacers? Well, mastering the art of tile installation isn't just about choosing the right tiles; it's also about comprehending how different spacer shapes can dramatically affect the outcome of your project. Each shape is designed to cater to specific needs, ensuring your tiles are perfectly aligned, and the pattern flows seamlessly.
X-shaped spacers are your go-to for creating intricate checkerboard patterns or any layout involving four-tile intersections. They're essential for achieving precision in these complex designs. T-shaped spacers are incredibly versatile, making them suitable for three-tile junctions and a variety of tile layouts. Their design allows for flexibility, ensuring you can adapt to the specific demands of your project.
For tasks requiring stability, such as leveling plywood on countertops, U-shaped (horseshoe) spacers are indispensable. Their unique shape offers the support needed for these specific applications. Wedge spacers are your best bet when dealing with vertical surfaces or needing to adjust tile alignment.
They're adjustable and stackable, accommodating uneven tiles and ensuring a flush finish. Comprehending these spacer shapes and their applications empowers you to tackle any tile installation project with confidence, ensuring a professional-grade outcome tailored to your specific needs.
Installation Techniques
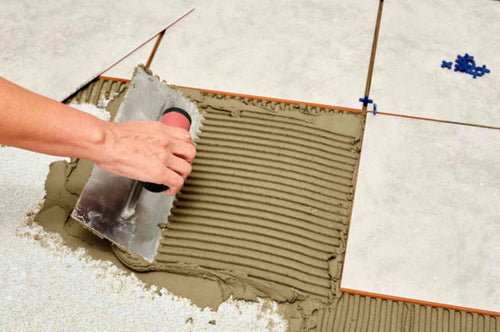
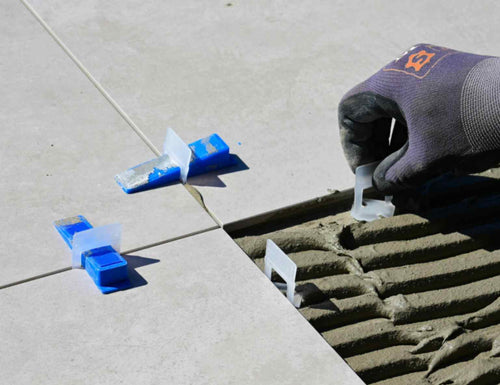
Having understood the significance of spacer shapes, let's focus on mastering installation techniques to ensure your tile project looks impeccable. Proper spacer placement is crucial; you'll want to position them at every tile corner to achieve even spacing.
This meticulous approach guarantees that your grout lines are consistent, enhancing the professional finish of your project. To maintain this uniformity, it's essential to keep an eye on the alignment of your tiles. Spacers aren't just placeholders; they're your best allies in aligning tiles precisely, significantly reducing the likelihood of ending up with misaligned or uneven tiles.
Remember, the goal is to achieve a tiled surface that's beautiful and flawlessly executed. However, timing is everything when it comes to spacer removal. Ensure you remove the spacers before the grout sets to avoid getting stuck, which can be a hassle later. This step is critical in preserving the integrity of your grout lines and the overall aesthetic appeal of your project.
Style and Aesthetics
Tile spacers guarantee your project's precision and greatly enhance its style and aesthetic appeal. By meticulously selecting the correct size and type of spacers, you're not just exploring tiles but crafting a visual narrative that speaks volumes about your style preferences and design goals.
The spacing between tiles, facilitated by these spacers, plays a pivotal role in defining the grout lines that frame each tile, contributing greatly to the overall visual impact of your space. As you dive into your project, remember that the choice of tile spacers can dramatically influence the perception of space and light within a room.
Opting for wider grout lines can impart a bold, distinct look, while narrower spacing may create a seamless, more unified appearance. This subtle manipulation of spacing can transform an ordinary room into a stunning showcase of your design prowess.
Achieving a polished and cohesive look hinges on your attention to detail with tile spacers. They're not just tools; they're your allies in enhancing the aesthetic quality of your tiled surfaces, ensuring that your project not only meets but exceeds your design expectations.
Frequently Asked Questions

How do I choose the right tile spacer size?
To choose the right tile spacer size, consider the tile dimensions and desired grout line width. Smaller tiles often need smaller spacers, while larger ones may require bigger spacers for a polished finish.
Which spacer is best for tiles?
Choosing the best tile spacer depends on your project's specifics. Consider the tile size and pattern. X-shaped ones are great for intersections, while T-shaped ones suit offset layouts. For large tiles, leveling clips minimize lippage.
How do I calculate how much tile spacers I need?
To calculate the tile spacers you need, measure the area, determine tile size and spacing, divide the total area by each tile's location, and then multiply the tile count by spacers per tile. Add extras for mistakes.
How do you determine the spacing between tiles?
You'll determine tile spacing by considering tile size and aesthetic preference. Most pros use 1/8-inch spacers for standard installations, seamlessly balancing visual appeal and structural integrity. Choose wisely to master your project's look.
Conclusion
As you start your tiling adventure, remember the power of choosing the right spacers. Whether it's the precision of X-shaped spacers, the strength of U-shaped ones, or the innovation of leveling clips, each plays a pivotal role.
The perfect spacer can make or break your project. From ensuring gaps are consistent to enhancing the overall aesthetics, the perfect spacer can make or break your project. So, plunge in, select wisely, and watch as your tiles lay seamlessly and stand the test of time beautifully.

