


Tile Corners - How to Set Them, Both Inside & Outside
Considering installing tiles in your home? That's a great idea. Not only do tiles add value to your property, but they're also incredibly easy to maintain and can last for decades to come.
While installing tile is relatively simple, ensuring the wall tile meets perfectly with the floor is a bit more difficult. The same goes for tiles that meet on the corner.
In this article, I'll go over everything you need about corner tiles - how to install them and what tools you'll need.
What Tools Will I Need To Do Tile Corners?
Before I get into the nitty-gritty of tile corners, let's review what tools you'll need to complete the job. Don't worry; you won't have to shell out an arm and a leg for the tools.
Here's what you'll need:
Safety Gloves and Glasses
Tile installation involves cutting tiles. You'll need a pair of safety glasses and gloves to prevent any injuries to your hands and eyes. You can check out our safety equipment if you don't already have some lying around.
Notched Trowel
You'll need a notched trowel to spread the adhesive correctly. If you don't have one, we've got you covered with the industry's best notched trowels.
Tile Cutter or an Angle Grinder
You'll need to cut some tiles to size. I recommend you try one of our angle grinder blades - they go through tiles like butter, leaving perfectly smooth edges.
Corner Tile - How To Tile Inside Corners
What Are Inside Tile Corners?
When you're working on a tile project, begin tiling from the middle of the room and work your way outwards. But sometimes, tiles won't fit perfectly, so you'll have to cut them.
Cutting tiles for inside corners can be tough.
Also, walls next to each other can move and eventually crack your grout lines.
That's why it's important to know how to install tiles in corners properly. By following the best tiling methods, you can give the room you're working on a professional finish that lasts.
Remove Old Flooring And Cut The Tile
If you're removing old flooring, such as wood, you can use an angle grinder to cut into it smoothly. For tight grooves, a chisel can help remove flooring, while a clawhammer is useful for lifting up floor panels near walls.
Remember to wear gloves and safety glasses for protection.
Once the old floor is gone, you can start laying your new tile. Apply adhesive to the backs of the tiles and set them in place. Use grout and spacers during this process.
Begin from the middle of the floor and work toward the edges of your tile. Use the angle grinder to cut any corner tiles to size. For precise tile cutting, we recommend you use "Dinky Doinker" Turbo Diamond Flush Mount Circular Saw Blade.
Its compact design and flush-cutting adapter ensure seamless corner cuts with an angle grinder blade. And if you really want to make sure your cuts are perfect, you should also use a square. We’ve partnered with Home Depot’s QEP to bring you one of the best tiling squares on the market.
Perfect for professionals and DIYers, it aids in cutting tile trims efficiently, ensuring precise 45-degree cuts and consistent results. After cutting with a saw, make sure to dry the back side of each tile to prevent water from affecting the adhesive bond or the inside wall.
Tiling Inside Corners
In the inside corner, use a trowel to apply adhesive. Spread the adhesive in a thin layer, ensuring it's visible on the surface. Apply a similar adhesive layer to the cut tile's back for the inside corner. Place the tile in the corner with the edge cut by the saw or cutting board facing inward.
After applying the adhesive layers, clean the trowel with a damp cloth or sponge, then wipe it dry. Allow the glue on the corner tiles to dry for about an hour before tiling the rest of the floor.
Apply Grout
To apply the grout, spread it over your tiles and press it into each tile line. While doing this, use a wet sponge to wipe away any excess grout. Afterward, scrape off any remaining residue from the floor's surface.
You don't need to grout your corner lines; leave them open.
Grouting where adjoining walls meet is a common mistake as it can lead to grout cracking over time or push a tile out of place.
Remember, each corner should have a space of at least 0.25 inches. Once you've finished grouting, remove the tile spacers and allow the grout to dry for a few days.
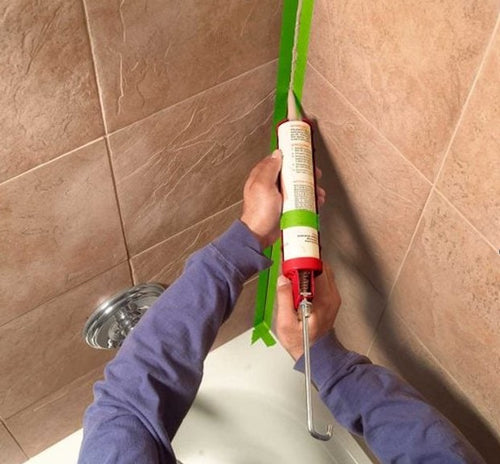
Fill The Corner Gaps
Once your grout has dried, you can apply caulk to the ungrouted corners. Caulk is recommended for mosaic and porcelain tiles because it's cost-effective and easy to use. Caulk forms a flexible, waterproof seal, preventing water from seeping into your walls.
It's crucial to use caulk in shower corners, where tiles meet each other and where tiles meet other hard surfaces like seats, shelves, doors, fixtures, windows, walls, or tub edges.
Caulking is especially important in a kitchen countertop or backsplash to prevent water from seeping through fixtures or fittings.
Before caulking, make sure there's a one-eighth-inch space between each tile. You can use either acrylic-latex or silicone caulk. Acrylic-latex caulk is inexpensive and adheres well to wood and various other materials, both porous and nonporous. It's easy to apply and clean, and you can paint over it.
Silicone caulk, though more expensive, offers flexibility, UV protection, and better water resistance. It's suitable for extreme weather conditions and temperature changes, making it ideal for gaps that may expand or contract over time. After applying the caulk, let it set for 24 hours to ensure it bonds properly.
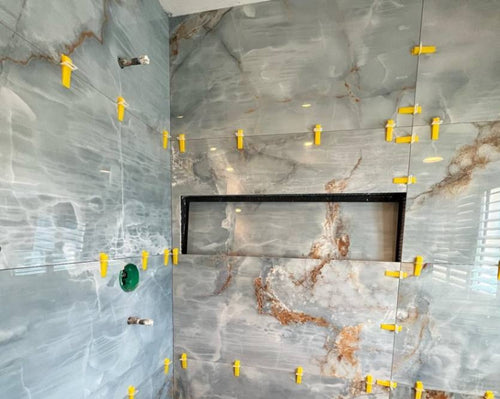
How To Tile A Shower Niche
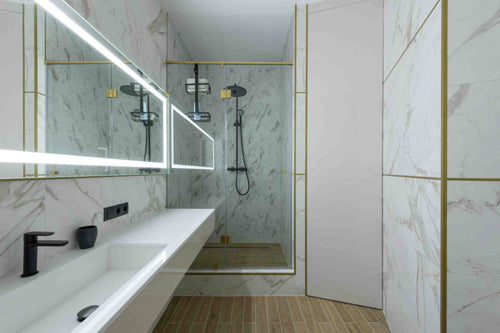
When tiling your shower area, you might want to install a niche—a recessed wall shelf for storing shampoo and soap. To tile the niche, start by creating a sill using the main tile.
Apply thin-set mortar to the bottom of your sill tile, then attach it to the niche. Make sure to slope it slightly (about 1/16 inch) toward your shower or tub to prevent water buildup and mildew.
Next, apply thin-set mortar to the back wall of the niche and embed your tiles into it. Use grout between the tile lines to finish. You can use horseshoe shims to align your grout joints and make them appear uniform.
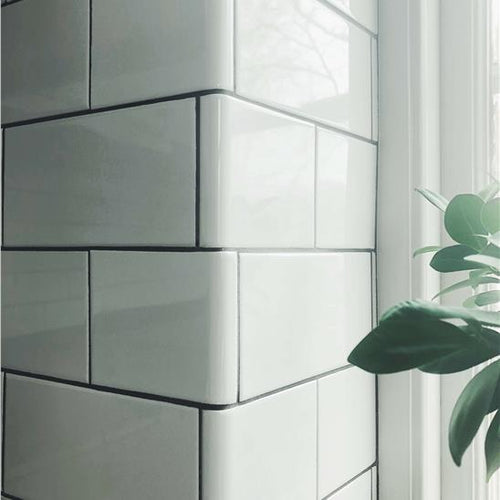
Corner Tile - How To Tile Outside Corners
As I said time and time again through this blog, tile installation can be quite a long and difficult process. It can take days to complete.
And if you have tricky corners you have to tile, it can get even harder. When tiling outside corners, you have to decide how you'll tile the outside edges and how you will hide the cut edges.
You have lots of options for this, and there are no right or wrong choices. What matters most is your personal taste, budget, and availability of your preferred tile.
Trim
Creating a trim is one of the simplest ways of doing it. A trim is nothing more than a simple strip that you set against a corner to hide the cut edge of your tile.
Trims are usually made out of plastic or metal and come in a wide range of colors. Plastic trim is the more affordable choice, offering a range of colors to match your tile easily. It's a great option if you prefer a simpler design.
On the other hand, metal trim is more durable and can provide a modern and elegant look. It tends to last longer than plastic trim.
Both types effectively seal the tiled wall, protecting it from water damage, and are easy to install, following a similar process to the rest of your tile installation.

Bullnose Edges
Bullnose edges are tiles that have a rounded edge. They're specially designed to fit on the outside corners. They have this rounded edge because then you don't have to hide the cut edge of the tile.
These trim pieces are designed to be installed similarly to the rest of your tile, making installation fairly easy. Most tiles come with matching bullnose edge pieces, simplifying the process of tiling outside corners. However, not all tile types have matching bullnose edges. In that case, you can create your own bullnose tile.
You'll need a tile saw, sandpaper, and possibly a polishing pad for this. It's best suited for certain tiles like natural stone or ceramics. Make sure to practice creating bullnose edges before starting your project.
Mitered Edges
Mitered edges are, by far, the most difficult to pull off and are best left to a professional. This is because you have to cut two tiles at a 45-degree angle so that they form a 90° angle when placed together.
When done correctly, the cut edges of the tile should not be visible at all. Many experts use this technique to achieve tile "waterfall" effects on countertops. The goal is to achieve a corner that appears completely seamless once the project is finished. That's why it's recommended to have experienced tilers handle this part.
They'll need top-quality tile cutters to execute it properly. While this method may be one of the most difficult, the results can be stunning and modern. It's particularly suitable for subway tile outside corners since the tiles have a straightforward shape.
Glazed Edges
Glazed edges are very similar to bullnose and mitered edge tiles. And if you're wondering what's the easiest way to tile to have your outside corner tiled, this is the easiest one.
A glazed tile comes with painted and glazed sides. This means that if you have the side of the tile exposed, you won't have to deal with an ugly-looking cut. Instead, you can put a glazed tile and have a perfect corner.
This approach allows you to create a cohesive design without the complexity of mitered corners. However, you'll have to find tiles with glazed edges that align with your design vision. And if you're a stickler for interior design, this method may not be suitable for you.
Corner Tiles
Corner tiles are specially designed for outside corners, providing a simple option for tiling them. They are installed in a similar manner to the rest of your tiles. There are two main types of corner tiles: rounded and right angles.
The choice between them depends on availability and your own preferences. A right-angle corner tile resembles the rest of your tiles but features two branches forming a right angle, suitable for both interior and exterior corners.
On the other hand, a rounded corner tile is smaller and fits between two regular tiles, matching the color and style of the overall design. When considering how to tile rounded outside corners, it's crucial to have the right tile cutters for the job.
However, this method heavily relies on availability. Not all tiles will have matching corner tiles, and unlike bullnose edge pieces, it's nearly impossible to make them, even for professionals.
Conclusion
Tiling corners can be challenging, but it's manageable with the right tools like safety gear, notched trowels, and tile cutters. Proper adhesive application and drying are key for inside corners.
Avoid grouting corners to prevent cracking; use caulk for flexibility and waterproofing. As for outside corners, you can always go for bullnose or corner tiles since they don't require any cutting or polishing. And if you're in need of high-quality tiling gear, check out our store.
We have everything a DIYer or a professional would need from cutting blades and polishing pads to tile spacers and grout sponges.